
Google Backup and Sync is a terrific tool for keeping your documents and files synced to your Google account, as well as allowing you to seamlessly backup your photo libraries to Google Photos. Unfortunately, some of the default settings are less than optimal for some users – this best practices guide is intended to help get it right to avoid slowdowns and excessive storage consumption on your Google account.
To get started, you can download Google Backup and Sync from here: https://www.google.com/drive/download/
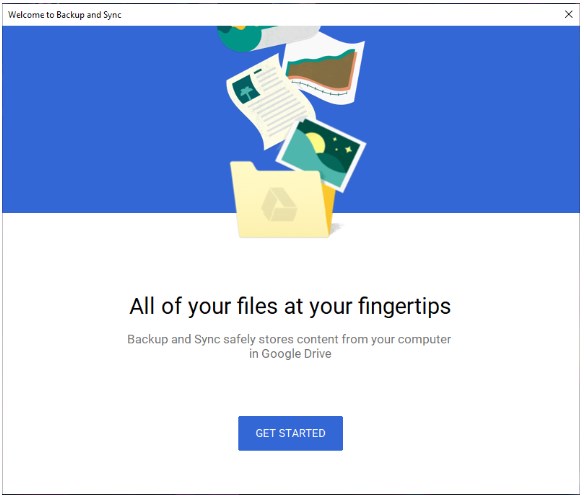
Once this downloads, simply run the file and it should install. Once it is installed, you should be presented with this screen here. Click “Get Started”.
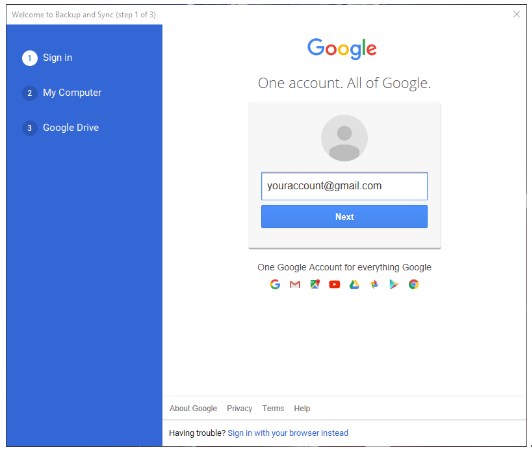
2. Sign in to your Google account. This can be a Gmail account or any other address that has been configured as a Google account.
3. Once signed in, you’ll be presented with a setup page. Unfortunately some of these options are particularly well explained, and the default options (shown below) aren’t really ideal.
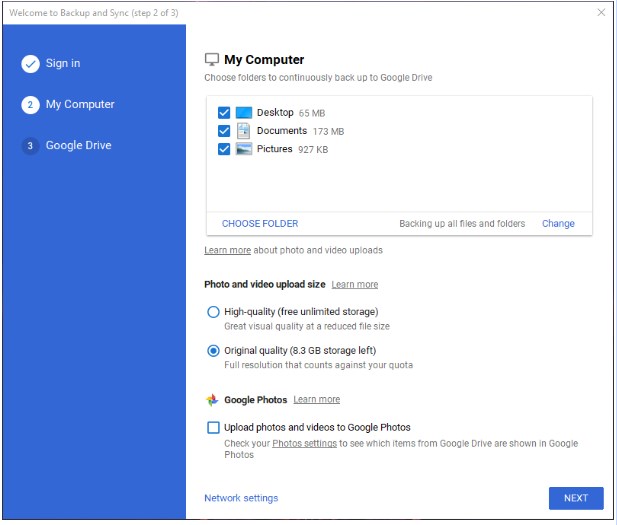
For most users, we don’t recommend backing up your Desktop or Documents folders using the “My Computer” feature here, but leave pictures checked. For starters. your desktop really shouldn’t contain anything important on it – only application shortcuts. If you happen to have documents or photos on your desktop, it is highly recommended to cut and paste these to your documents or pictures folders instead, otherwise these won’t get backed up. It’s also just a good practice. Same goes with photos that are in your documents folders – it’s usually best to cut and paste these into your pictures folder first.
Before you say “But hey! I want to backup my documents!” – don’t stress – that is covered in the next section.
If you happen to have any other folders that contain media files that you wish to backup to Google Photos, click the “Choose Folder” button and select the desired path.
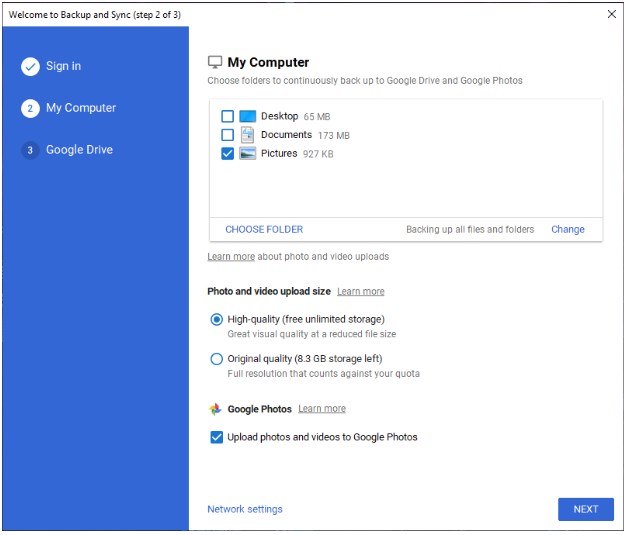
When moving onto the “Photo and Video Upload size” section, unless you are a serious professional photographer or artist that needs the full detail of 20+ MP photos for prints, then select the “High Quality” option. The high-quality scales photos and videos down to 16mp and 1080p video, but still looks great – see here for a comparison. Using the “Original quality” option will gobble up your Google account storage pretty quick and you’ll need to subscribe to additional storage if you are wanting to use this option.
Assuming you are wanting to backup your personal photo libraries to Google Photos, check the box that says “upload photos and videos to Google Photos”. It should end up looking like this:
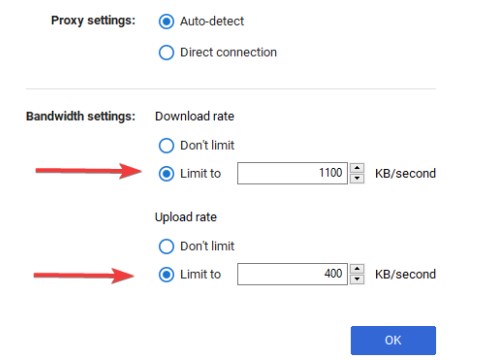
The last option here at the bottom is “Network settings”. This can be very important to set correctly if you are on a slow connection. If you are on ADSL or a mobile broadband connection, set the download rate to 350kbps, and the upload rate 90kbps. If you are on standard NBN, set the download rate to 1100kbps and upload rate to 400kbps. This setting will ensure that Google Backup and Sync doesn’t gobble up your entire internet bandwidth and make the internet unbearably slow for everyone else. You can set your own values if you are more familiar with the speed of your connection, but the above values are usually safe to use (although it will make synchronization slower)
Now that we are done here, click “OK” and “Next”.
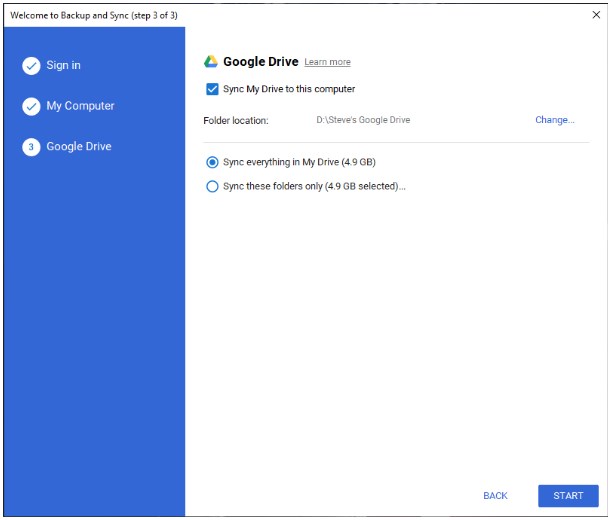
In the next section, you will be presented with Google Drive options. Google Drive is a service that allows you to select a folder on your computer that will synchronise your files in real-time on any device that has Google Drive configured, and to https://drive.google.com. This makes it super easy to securely access your documents and files on a second PC or on a mobile device. If you have documents on your computer that you wish to have synced to your other devices, we recommend getting these migrated to Google Drive, which we will cover in a moment.
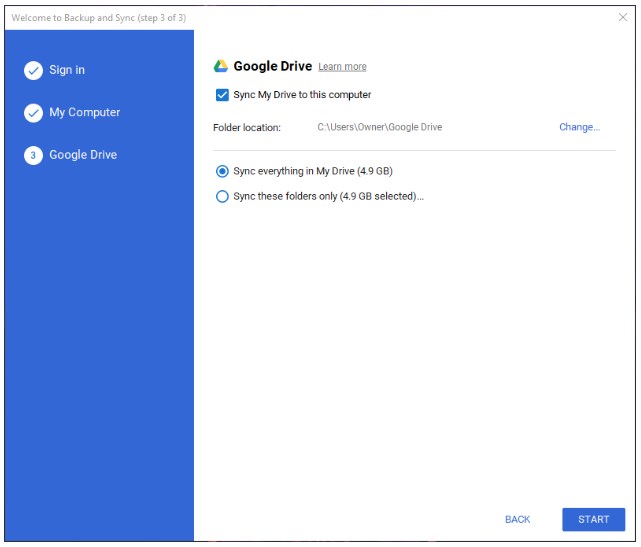
Of course, if you have no desire to syncronise documents with Google Drive, you can completely turn this off by unchecking “Sync my drive to this computer”, but most users will want to have Google Drive available. There are two more settings here, which we’ll dive into:
1. Folder Location
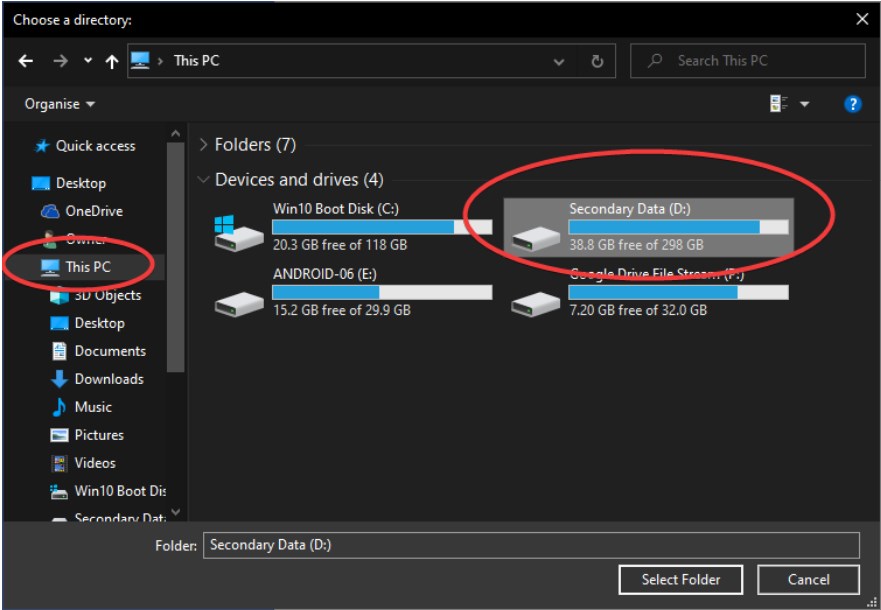
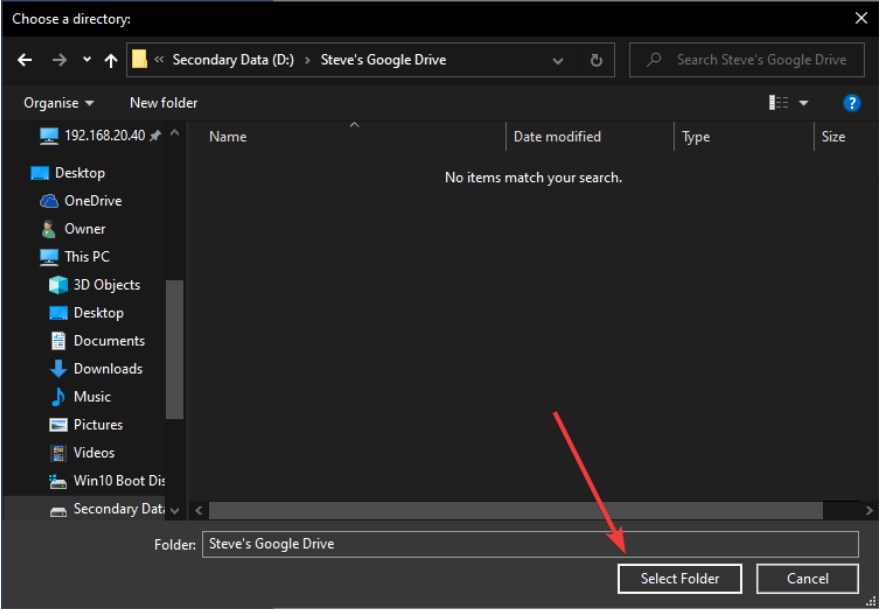
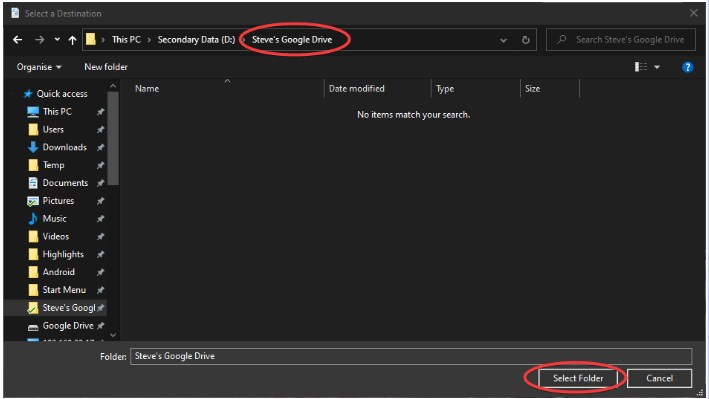
By default, Google Drive will create a folder called “Google Drive” within your user folder on your C drive. This is normally fine, and you can normally leave this alone without issues. That said, if you happen to have a setup where you have a small primary drive, (eg. Solid State Drive / SSD), coupled with a larger secondary data disk, then you may want to elect to store Google Drive on the secondary drive instead. To do this, click on “Change” and then navigate to the path that you wish to store the folder. Typically you will want to go to “This PC”, double click your secondary drive, and then create a folder (eg. “Steve Google Drive”). Once the folder is created, navigate to the folder and then click “Select Folder”.
Your new folder should now appear.
2. Folders to Sync
A nice feature to have is the ability to selectively sync specific folders. This can be handy if you have a lot of large files in your Google Drive and only want to sync specific items, but generally speaking for most users, it’s recommended to just leave the default setting to “Sync Everything in my Drive”
We can now click start. It will take a few moments to initialise, but we are not done yet!
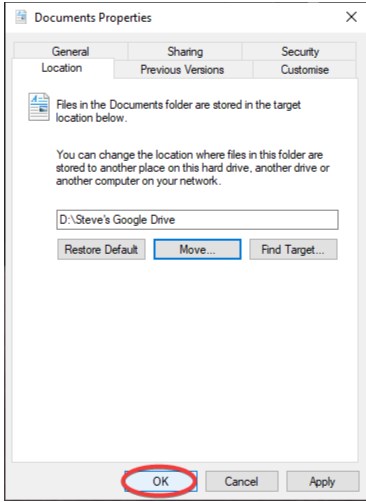
The last step here that we recommend is to merge our traditional documents folder with Google Drive, so that it becomes the defacto location for you to store any documents and important files. One of the things we found is that even though the Google Drive folder is in the quick access menu, a lot of people seem to forget this and continue saving their documents and files in “Documents” which then doesn’t sync anywhere, and defeats the purpose of setting up Google Drive in the first place.
One very underrated feature in Windows is the ability to use symbolic links, which in simpler terms is a way for your computer to say “hey, your files are actually over there”. This means that whenever you go to save a file in “documents”, it’s actually saving it into your Google Drive, and in turn syncing it to your other devices. Pretty cool, huh?
This step is optional, but still highly recommended. One word of warning however – if you run any software that stores and regularly modifies large files in the documents folders (eg. some accounting packages) then you should skip this step to avoid potential issues.
To do this, open File Explorer, and right click on your “Documents” folder (usually under “quick access” and click on Properties.

From here, go to the “Location” tab, and then click on “Move”.

From here, navigate to your Google Drive Folder again (it will be in quick access) and then click “Select Folder”
Once this is done, click OK and you’re done! Your existing documents on your PC will merge with Google Drive and be available on your other PCs.
All done!