
Installing Google Drive for Desktop
Google Drive is the file sharing application from Google where you can store your files and access them any time across various devices such as phones, tablets and personal computers.
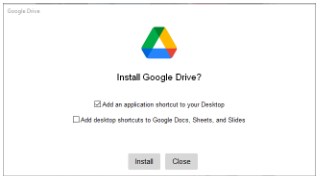
1. Follow the link to Download Drive for Desktop and click install.
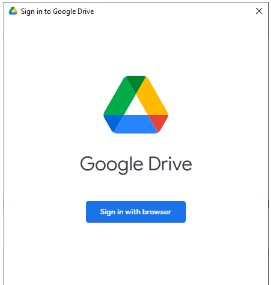
2. It will prompt you to sign in with your browser.
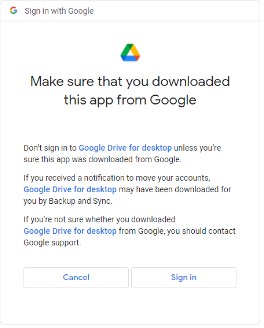
3. Next page will display some warnings. Proceed with sign in.
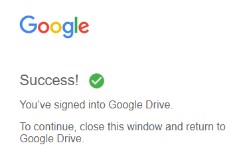
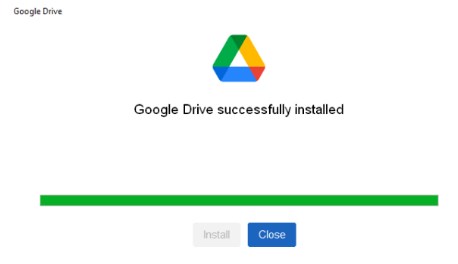
4. You will get the following pages once you successfully sign in from your browser.
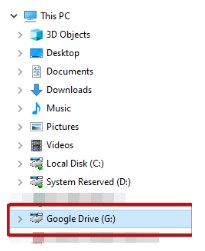
5. Drive G will now show up on your file explorer.
6. Once the setup is complete, we need to do a few more steps to make the best out of your Google Drive.
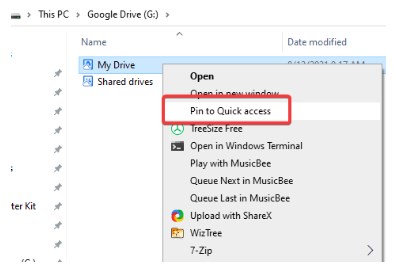
a. Pin “My Drive” to Quick Access. Go to your Google Drive and right click on My Drive and select pin to Quick Access. This will create a shortcut icon to your Quick Access panel on Windows Explorer. You may also do the same for subfolders.
b. Folder Location – By default, Google Drive will create a cached folder on your C drive. This is normally fine, and you can normally leave this alone without issues. That said, if you happen to have a setup where you have a small primary drive, (eg. Solid State Drive / SSD), coupled with a larger secondary data disk, then you may want to elect to store Google Drive on the secondary drive instead.
To do this, right-click on Google Drive Icon then click the settings icon (cog) > Preferences.
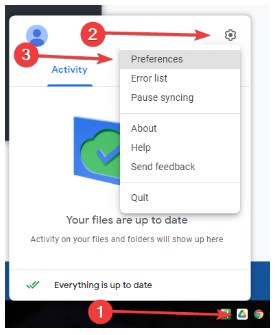
A new window will pop up. Click on the settings icon (cog) again.

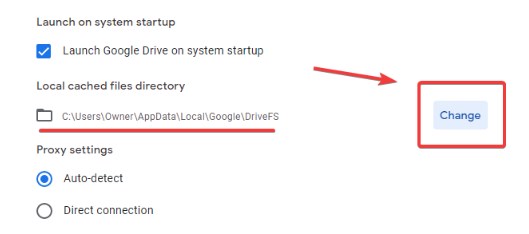
Scroll down and find Local cached files directory. Click on “Change” and then navigate to the path that you wish to store the folder.
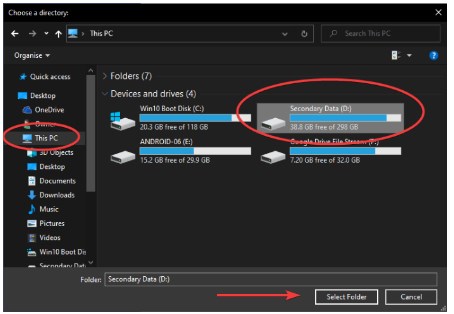
Typically you will want to go to “This PC”, double click your secondary drive, and then create a folder (eg. “Steve Google Drive”). Once the folder is created, navigate to the folder and then click “Select Folder”.
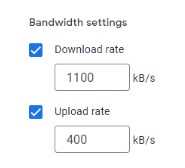
c. Bandwidth settings. This can be very important to set correctly if you are on a slow connection. If you are on ADSL or a mobile broadband connection, set the download rate to 350kbps, and the upload rate 90kbps. If you are on standard NBN, set the download rate to 1100kbps and upload rate to 400kbps. This setting will ensure that Google Backup and Sync doesn’t gobble up your entire internet bandwidth and make the internet unbearably slow for everyone else. You can set your own values if you are more familiar with the speed of your connection (remember that 8Mbps = 1000kb/s), but the above values are usually safe to use (although it will make synchronization slower).
To set this, just go back to Google Drive preferences illustrated on step b and scroll down a little bit until you see Bandwidth settings.
d. Consider disabling the back up USB Device feature. Connected flash drives might get backed up and consume more space on your Google Drive. To disabled this, go back to preferences on step b and scroll to the very bottom of the settings page.
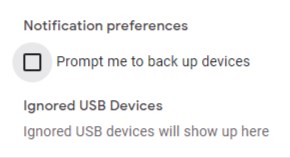
Untick the box that says Prompt me to back up devices then click Save.
Transitioning from Backup and Sync to Google Drive for Desktop
Google is combining two of their cloud sync solutions into one. Google Backup and Sync, which was made for consumer users, and Drive File Stream, which was targeted for business users, will now be just called Google Drive.
1. If you have been using Backup and Sync before, chances are you will be prompted to start moving to Google Drive.
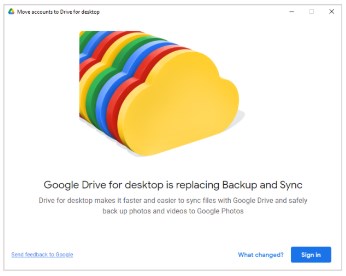
2. Download Google Drive for Desktop if it hasn’t prompted you already. Proceed with the installation and sign in.
3. A setup wizard will appear and help guide you through the whole process.
a. We recommend unticking the box that says backup Google Photos to Google Drive as this would be redundant and would just take double the amount of space.
b. A scan will run and could take anywhere from a few minutes to several hours. You can let it run in the background and do something else while it’s scanning your folders.
c. Backup and sync uninstall should commence once the setup wizard is complete.
Troubleshooting Google Drive
Google Drive Doesn’t Run or Load Files Correctly
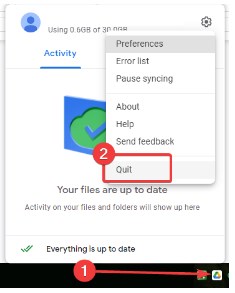
Sometimes, restarting the app will fix the issue. For Windows, in the bottom right taskbar, click Settings and then Quit (For Mac, check on the top menu bar, click Settings -> Settings and then Quit).
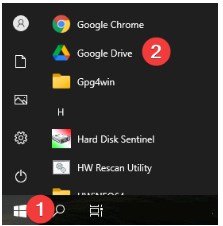
Then click on Start, search for Google Drive then click to launch the app.
If you are still having issues – restart your computer using the “Restart” option in the power menu.
Verify that you have Internet Connectivity
Run a speed test by going to Speedtest.net and check if you have any latency issues or errors.
My Antivirus Software Popped up and Google Drive Isn’t Loading
Your Antivirus software may have either detected a virus, or a false positive, within your Google Drive. Remove the malicious file in question and restart your computer.
Google Workspace Status Dashboard
https://www.google.com/appsstatus/dashboard/
Go to Google Workspace Status Dashboard to check if there are outages across all Google services including Google Drive.
Google Drive for Desktop Crashes or Unable to Start
If you have done the steps above and still can’t get your Google Drive App to launch, then follow the steps below.
1. Uninstall Google Drive.
2. Copy this folder path: %USERPROFILE%\AppData\Local\Google\DriveFS
3. Enter it in your File Explorer.
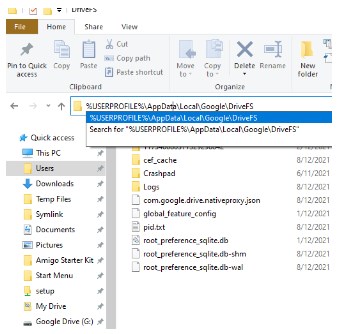
4. Manually delete cache by deleting everything in this folder.
5. Copy this folder path: %USERPROFILE%\AppData\Local\Google
6. Enter it in your File Explorer. If you see a “DriveFS” folder or link, delete it.
7. Reboot your computer.
8. Re-install Google Drive via Chocolatey or from the Google Drive website.
9. Re-install and configure Google Drive and check your settings and preferences.