
Outlook Calendar is a component of Microsoft’s email and personal information management application, Outlook. It allows users to create and manage appointments, events, and meetings, and share their calendar with others. Outlook Calendar offers a range of features to help users stay organised, such as reminders, recurring events, and the ability to view multiple calendars side-by-side. It also integrates with other Microsoft 365 applications, such as Teams and SharePoint, to create more comprehensive workflows. In this guide, we will be focusing on a few select features of the Calendar while also going through some best practices and advanced tips.
Best Practices for Using Calendar
Using Outlook calendar can help you stay organised and manage your schedule more effectively. By following these best practices, you can get the most out of this powerful tool. Here are some best practices for using the Calendar application:
1. Keep it up to date
Make sure your Outlook calendar reflects your current schedule. This means adding new appointments and events as they arise and deleting or rescheduling items as necessary.
2. Use color coding
Assign different colors to different types of appointments or events. This can make it easier to scan your calendar and identify what’s coming up.

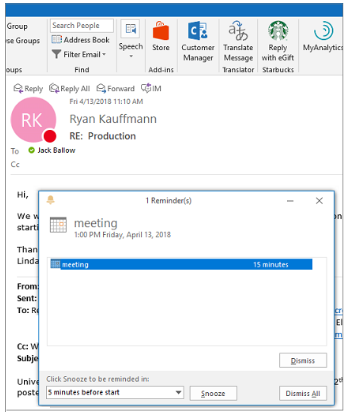
3. Set reminders
Use reminders to make sure you don’t miss important appointments or deadlines. You can set reminders to pop up on your screen, send you an email, or even play a sound.
4. Share your calendar
If you work on a team, consider sharing your calendar with your colleagues. This can help you avoid scheduling conflicts and make it easier to coordinate meetings and other events.
5. Use the scheduling assistant
When scheduling meetings, use the scheduling assistant feature to see when everyone is available. This can save time and ensure that everyone can attend. More information on this feature later on.
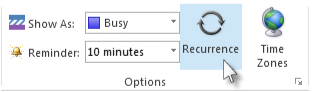
6. Use recurring events
If you have regular appointments or events, use the recurring events feature to schedule them automatically. This can save time and ensure that you don’t forget to schedule them.
Some additional tips like showing multiple time zones, viewing multiple calendars, and enabling dark mode, can be viewed in this extensive tutorial video.
Advanced Tricks for Using Calendar
These advanced tricks can help you get even more out of Outlook Calendar and manage your schedule more effectively:
1. Create templates for recurring events
If you have recurring events with a lot of details, such as weekly team meetings or client check-ins, you can create a template for these events. This can save time and ensure that each event has all the necessary details.
2. Set up custom reminders
While Outlook offers standard reminder options, you can also set up custom reminders for specific events. For example, you could set a reminder to check your presentation slides the night before a big meeting.
3. Use categories to organise events
Outlook allows you to assign categories to events, which can help you quickly see what types of events you have coming up. For example, you could use categories such as “work”, “personal”, “travel”, or “client meetings”.
4. Use the weather forecast feature
Outlook can display the weather forecast for your location on the calendar. This can be helpful if you’re planning outdoor events or need to dress appropriately for the weather.

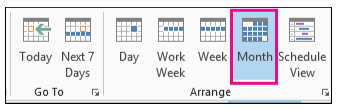
5. Create a schedule view
If you have a lot of events and appointments, you may find it helpful to create a custom schedule view. This can allow you to see your entire day, week, or month at a glance.
6. Schedule emails
Outlook allows you to schedule emails to be sent at a later time. This can be useful if you want to send an email outside of regular business hours or if you want to send a reminder email before an event.
7. Use the calendar search feature
If you’re having trouble finding a specific event or appointment, use the calendar search feature to quickly locate it. You can search by keywords, dates, or other criteria.
More advanced tips can be viewed in this extensive tutorial video.
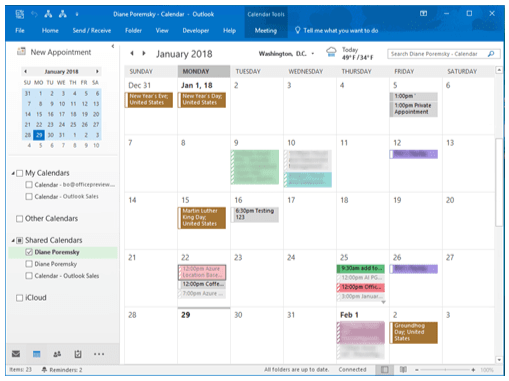
How to Use Shared Calendars
Using shared calendars on Outlook can be incredibly helpful for team collaboration and scheduling. By sharing your calendar with colleagues or team members, you can keep everyone informed about your schedule and availability, and also keep track of theirs. This makes scheduling meetings and appointments much easier, as you can quickly see when everyone is available and avoid conflicts. Additionally, if you’re working on a project together, you can use shared calendars to keep track of important deadlines and milestones. Here’s how to share your calendar:
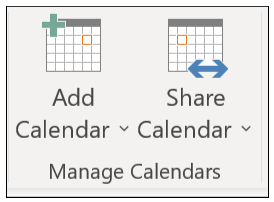
1. Select Calendar > Share Calendar.
2. Choose a calendar to share.
3. Select Add, decide who to share your calendar with, and select Add.
4. Select OK and you’ll see the added people with a default permission level.
5. Choose a name, select the access level to give, and select OK.
If you want to open a shared calendar, follow these steps:
1. Open an email with a shared calendar and select Accept.
2. Select Calendar > Shared Calendars to view a shared calendar.
3. Choose a calendar to open.
4. Select View in Overlay Mode to layer the shared calendar over your own.
An overview of how to share calendars can be viewed in this video.
How to Use the Scheduling Assistant
The Scheduling Assistant is a tool within Outlook that allows you to view the availability of attendees when scheduling a meeting. It can help you find a meeting time that works for everyone by showing you when each attendee is busy or available. Important: everyone should actively mark their availability on their calendar for this to work well.
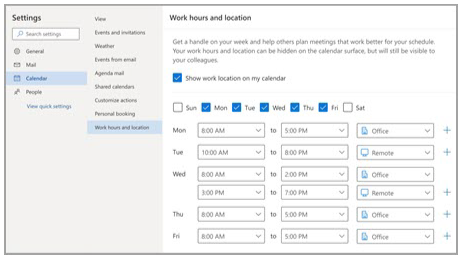
To set your work schedule in Outlook, do the following:
1. Select Settings > View all Outlook settings > Calendar.
2. Choose Work hours and location, and then define your work schedule by choosing days, times, and locations.
Here’s how to use the Scheduling Assistant in Outlook:
1. Open a new meeting invitation in Outlook.
2. Add attendees to the meeting invitation.
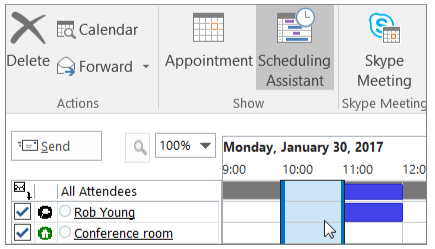
3. Click on the “Scheduling Assistant” tab in the ribbon.
4. In the Scheduling Assistant view, you will see a calendar showing the availability of all attendees. You can adjust the date and time of the meeting using the controls at the top of the screen.
5. The availability of each attendee will be shown in different colors, with busy times marked in gray and available times in white. You can hover over each attendee’s name to see their availability in more detail.
6. To suggest a meeting time, simply click and drag over the desired time slot in the calendar. This will create a tentative meeting in the calendar.
7. If any attendees have conflicts with the suggested meeting time, the conflicting times will be marked in red on the calendar.
8. You can continue to adjust the meeting time until you find a time that works for all attendees.
9. Once you have selected a meeting time, click “Send” to send the meeting invitation.
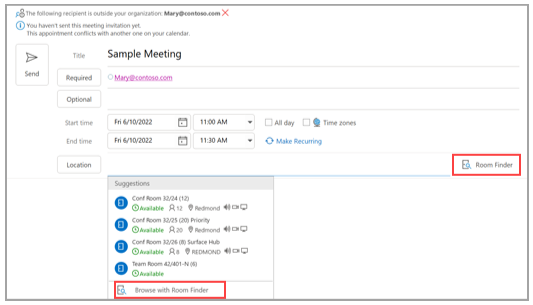
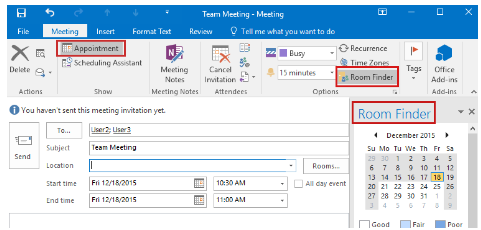
How to Use Room Finder
Room Finder is a feature in Outlook that helps you find available meeting rooms when scheduling a meeting. It allows you to search for meeting rooms based on location, capacity, and available amenities, and then book the room directly from within the meeting invitation.
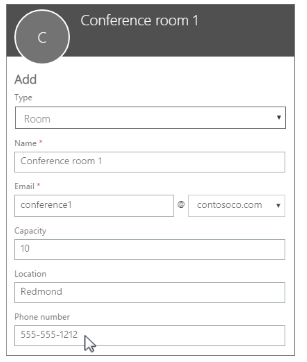
Before rooms can be booked, they have to be set up in the admin center first. If you have admin permission then you can add the rooms on your own. Some of the options for proper room management will need to be done through Powershell, like Auto-Accept / Auto-Decline(for conflicts) and showing the full details of the meeting on the Room calendar. In this case, contact your MS365 administrator then provide them these details:
1. Room name
2. Email alias of the room (if you don’t have this, let your administrator know)
3. Capacity
4. Location
5. Phone number of the room itself
Opening the Room Finder
The Appointment screen in Outlook
The Scheduling Assistant screen in Outlook

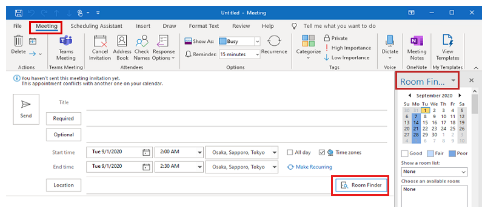
The Meeting tab of Outlook in Outlook for Microsoft 365
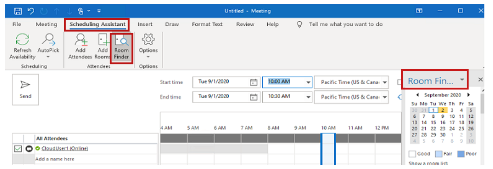
The Scheduling Assistant tab in Outlook for Microsoft 365
Booking a room on Outlook Desktop
1. Open Outlook on your computer.
2. On the Home tab, choose New Items > Meeting.
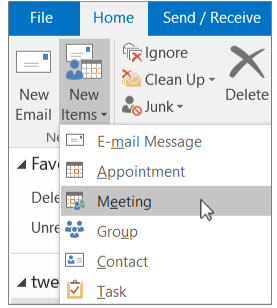
You can also open a meeting from your Calendar by choosing “New Meeting”
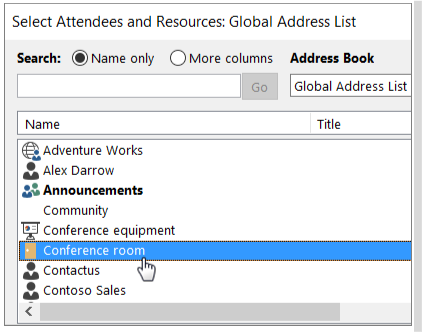
3. In the To field, type the name of the conference room or equipment you want to reserve, in addition to any attendees you’d like to invite. Or, select To then double-click the conference room or equipment from the list. Then select OK.
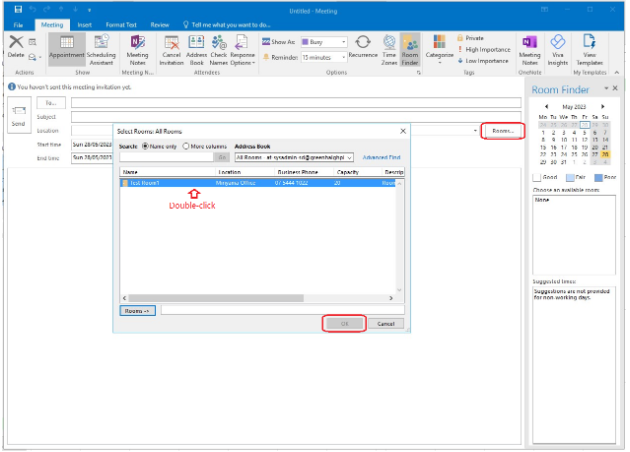
4. Alternatively, you can click Rooms in the Meeting window > Double click the room and press OK.
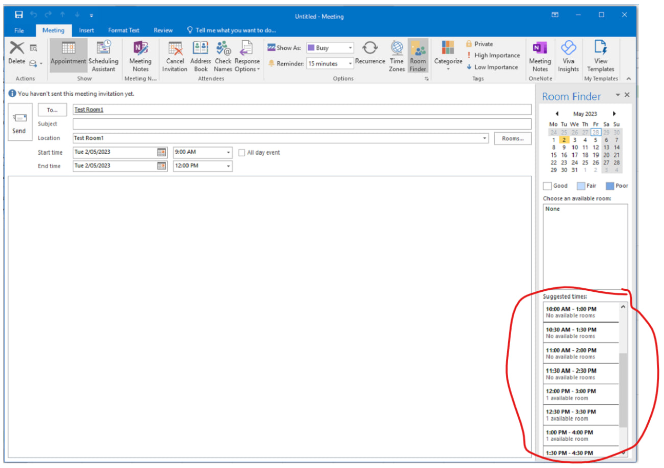
5. Once the room has been added, you should see under Suggested times if there are any conflicts. This will also tell you if there are other rooms available.
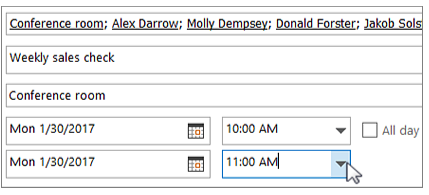
6. In the Subject line, type the purpose of the reservation or meeting.
7. Change the Location value or leave as is.
8. Change the Start time and End time. Or, select All day event. To make the meeting or reservation repeat, select Recurrence at the top.
9. Type a message describing the purpose and attach any files if needed.
10. To allow others to join online or call in to the meeting, select Teams Meeting.
11. To make sure the room, equipment, and people you’ve invited are available, select Scheduling Assistant at the top. Then select an available time in the calendar.
Booking a Room in Outlook Web
Booking a room through the Outlook web version is a bit different as the room finder won’t be populated with the rooms that we created. When searching for a room, it actually searches public rooms from all organizations and so we don’t use this.
To do this, we just have to add the email address of the room under “Invite attendees”, as shown below:
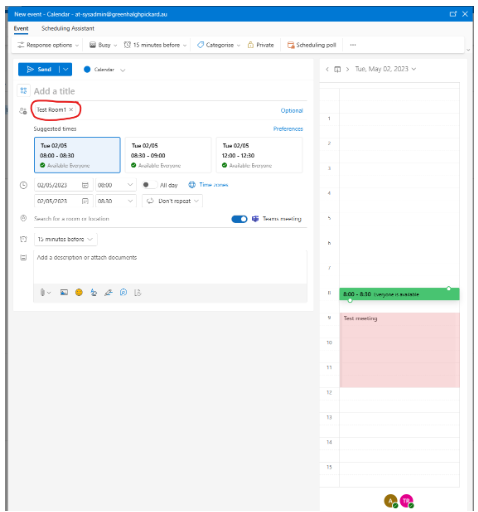
From this image, we can see scheduled appointments from other users for that room on the right hand side highlighted in red.